

Opening or Creating a WakerFlow
Click “WakerFlow” in the left navigation to enter the WakerFlow management page.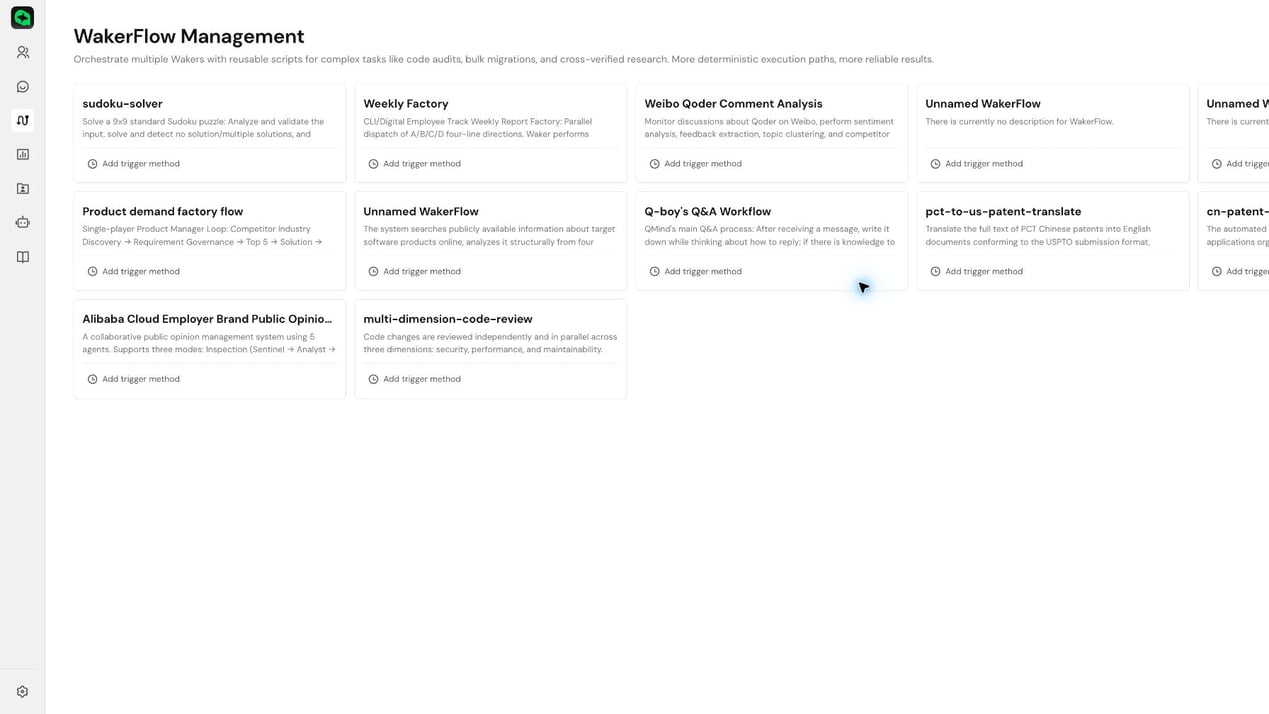
- Click “New WakerFlow” on the WakerFlow list page.
- Enter your goal in the blank workspace, clearly describing the run inputs, processing steps, role assignments, error handling, and output format.
- Wait for the system to generate the canvas and script. Open “Script” and check the input fields, target Wakers, and the final
return. - Edit the name at the top and add a description of the workflow’s purpose in “Detail Settings”.
- Click “Run” in the top-right corner to complete one manual test run.
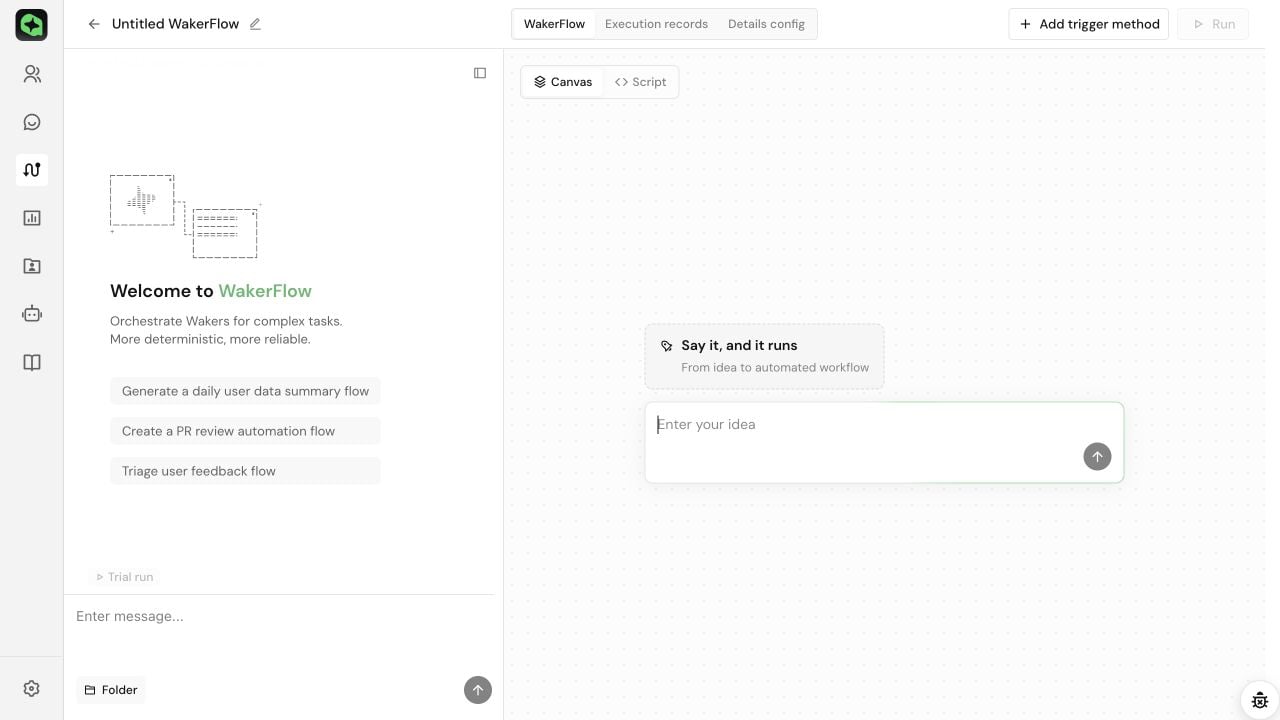
- The canvas has generated phases and nodes, and the script is not empty.
- The run form contains the required fields, and every Worker points to a Waker in the current environment.
- The script has an explicit
returnwhose content meets delivery requirements.
Understanding the Detail Page
The WakerFlow detail page is divided into three areas:
The top-right “Run” button is for manually executing the current workflow. “Add Trigger” or “Manage Triggers” is for configuring automatic runs. These are not the same operation.
Canvas
The canvas parses the script into phases and node relationships, making it easy to quickly understand the workflow structure.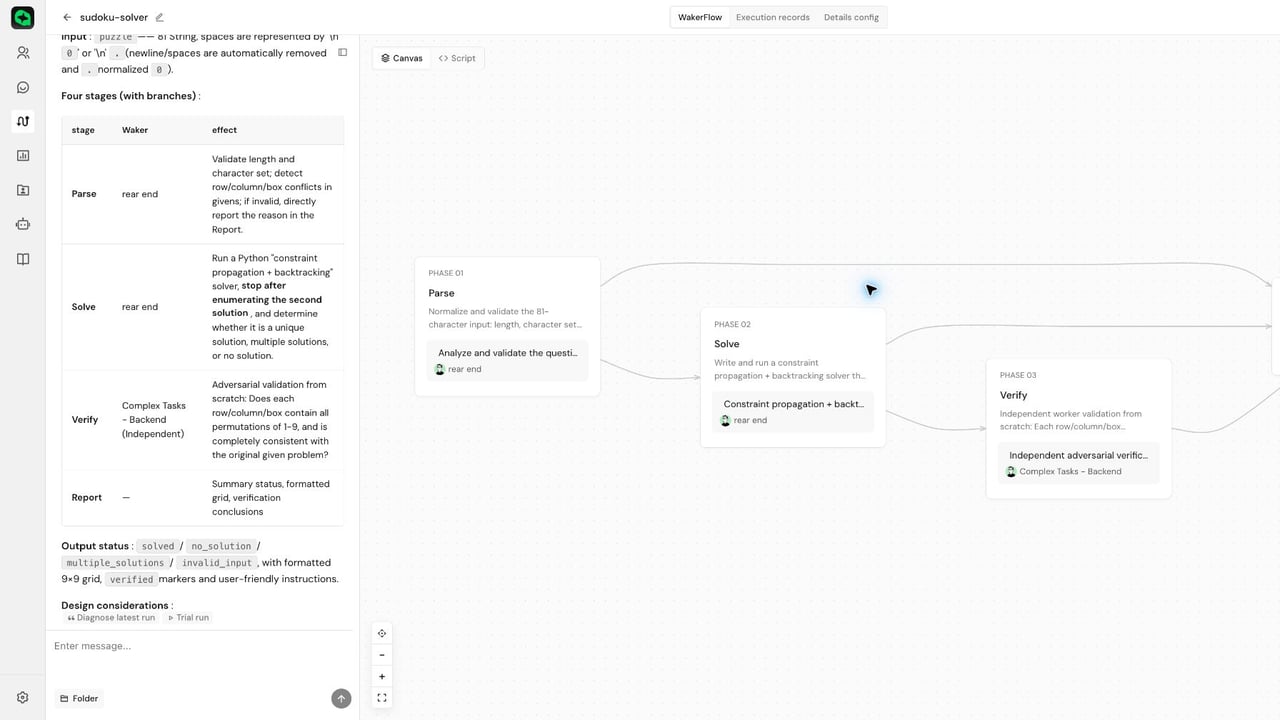
Conditions, error handling, and return structures not shown on the canvas are governed by the script. “Run Configuration” contains fillable fields, not the actual parameters of a past run.
Adjusting Scripts and Versions
- Describe the modification requirements in the customization conversation on the left, or directly edit the “Script”.
- After saving, check the canvas, run inputs, and
return, then do a manual test run. - When you need to restore a previous version, preview and roll back in “Version History”.
Run History
Run history shows the run ID, trigger method, and node status. Click a node to view its input, session, result, or error. The logs and final return value for the entire workflow are available in the run details.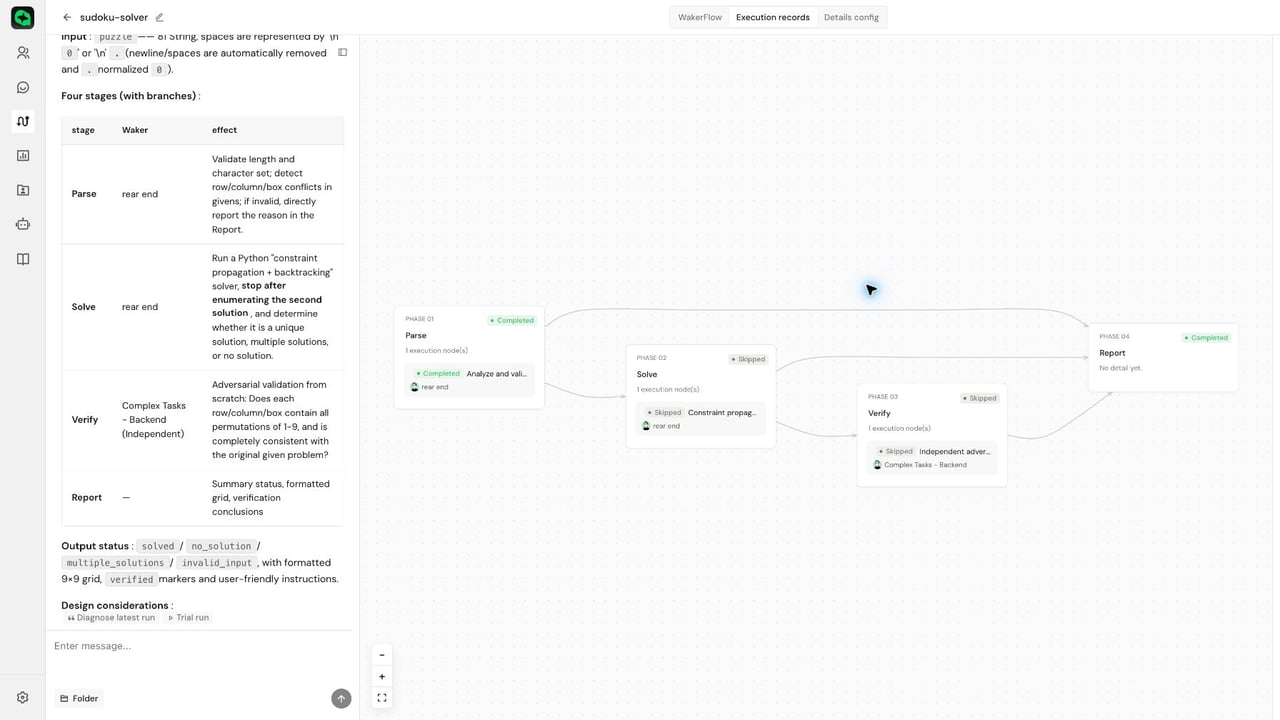
Configuring Run Inputs and Final Output
The run form is generated frommeta.inputSchema in the script; filled values are passed in via args. The final deliverable is determined by return.
- In
inputSchema, set field types, descriptions, default values, and required fields. - Click “Run” and check whether the form fields and default values are correct.
- After running, check whether the “Final Return Value” meets expectations.
Objects or arrays must contain valid JSON. When fields are missing, formats are incorrect, or types do not match, the page will block submission or show a validation failure.
Orchestration Capabilities Quick Reference
When modifying scripts, use the following capabilities as needed:Manual Run and Handling User Input
Manual Run
- Click “Run” in the top-right corner of the detail page.
- Fill in run parameters. Required fields cannot be empty; objects and arrays must use valid JSON.
- After submission, view node progress in “Run History”.
- After the run completes, check the status and “Final Return Value”.
“Completed” only means the script finished successfully — it does not automatically prove the business content is correct. You still need to check whether the final return value contains the expected fields, quantities, and evidence.
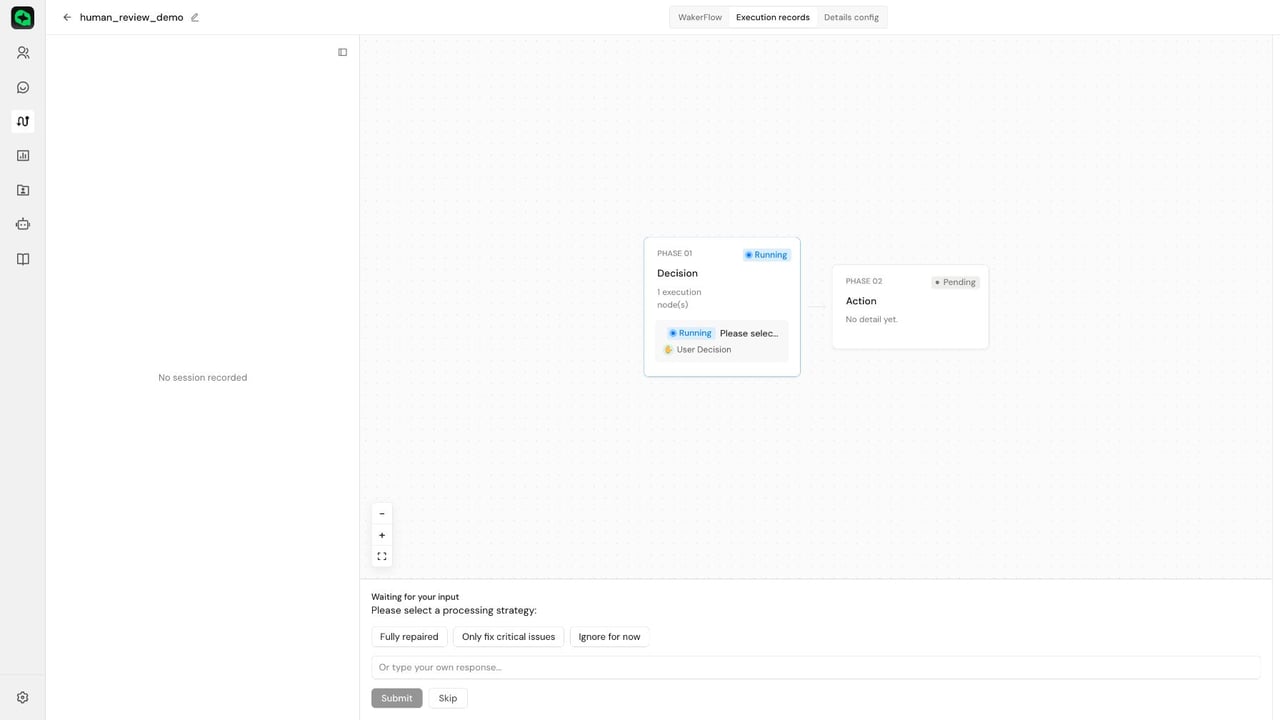
Waiting for User Input
askUser() can generate text prompts, options, or approval cards. The script should clearly define the question, options, timeout, and default handling behavior.
Correctly Understanding Run Configuration, Business Logs, and Results
This is the most commonly confused part when reading WakerFlow run records.Where Each Type of Information Comes From
When the script does not explicitly
return, the run may still succeed, but the final return value will be null.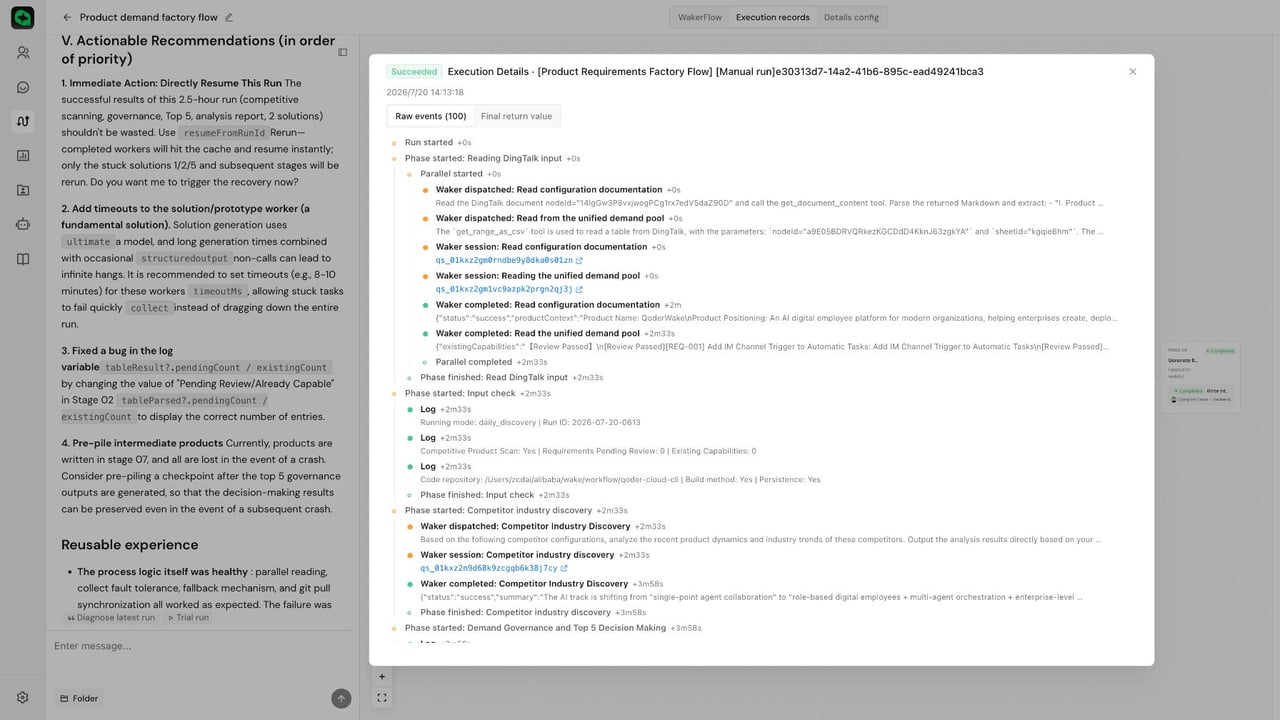
log() calls like the following:
+2m33s on the right is the time of the event relative to workflow start, not the duration of that log entry.
Where to View Actual Results
Log writing recommendations:
- Logs should only record phases, counts, key decisions, and exceptions — do not write complete large objects or credentials.
- Use log levels
info,warn,error. - Content that needs to be delivered must be explicitly
returned — do not rely on logging alone.
Configuring Automatic Runs
A single WakerFlow can have multiple trigger methods. The quantity and type limits are shown on the current page.
- First complete a manual test run and confirm the final return value is correct.
- Click “Add Trigger” in the top-right corner, or go to “Detail Settings” → “Manage Triggers”.
- Configure default parameters and add scheduled, API, GitHub, or page-provided event trigger methods.
- Save and enable, then wait for a real trigger or use the test entry provided on the page.
- Return to “Run History” and verify the trigger method, run ID, status, and final return value.
- Keep phase and node names clear; use Schema to constrain downstream data.
- Retain human confirmation before external writes, message sends, or publishing.
- For important changes, preserve a version and do a manual test run first. Retries do not undo external operations that have already occurred.