

Workspace
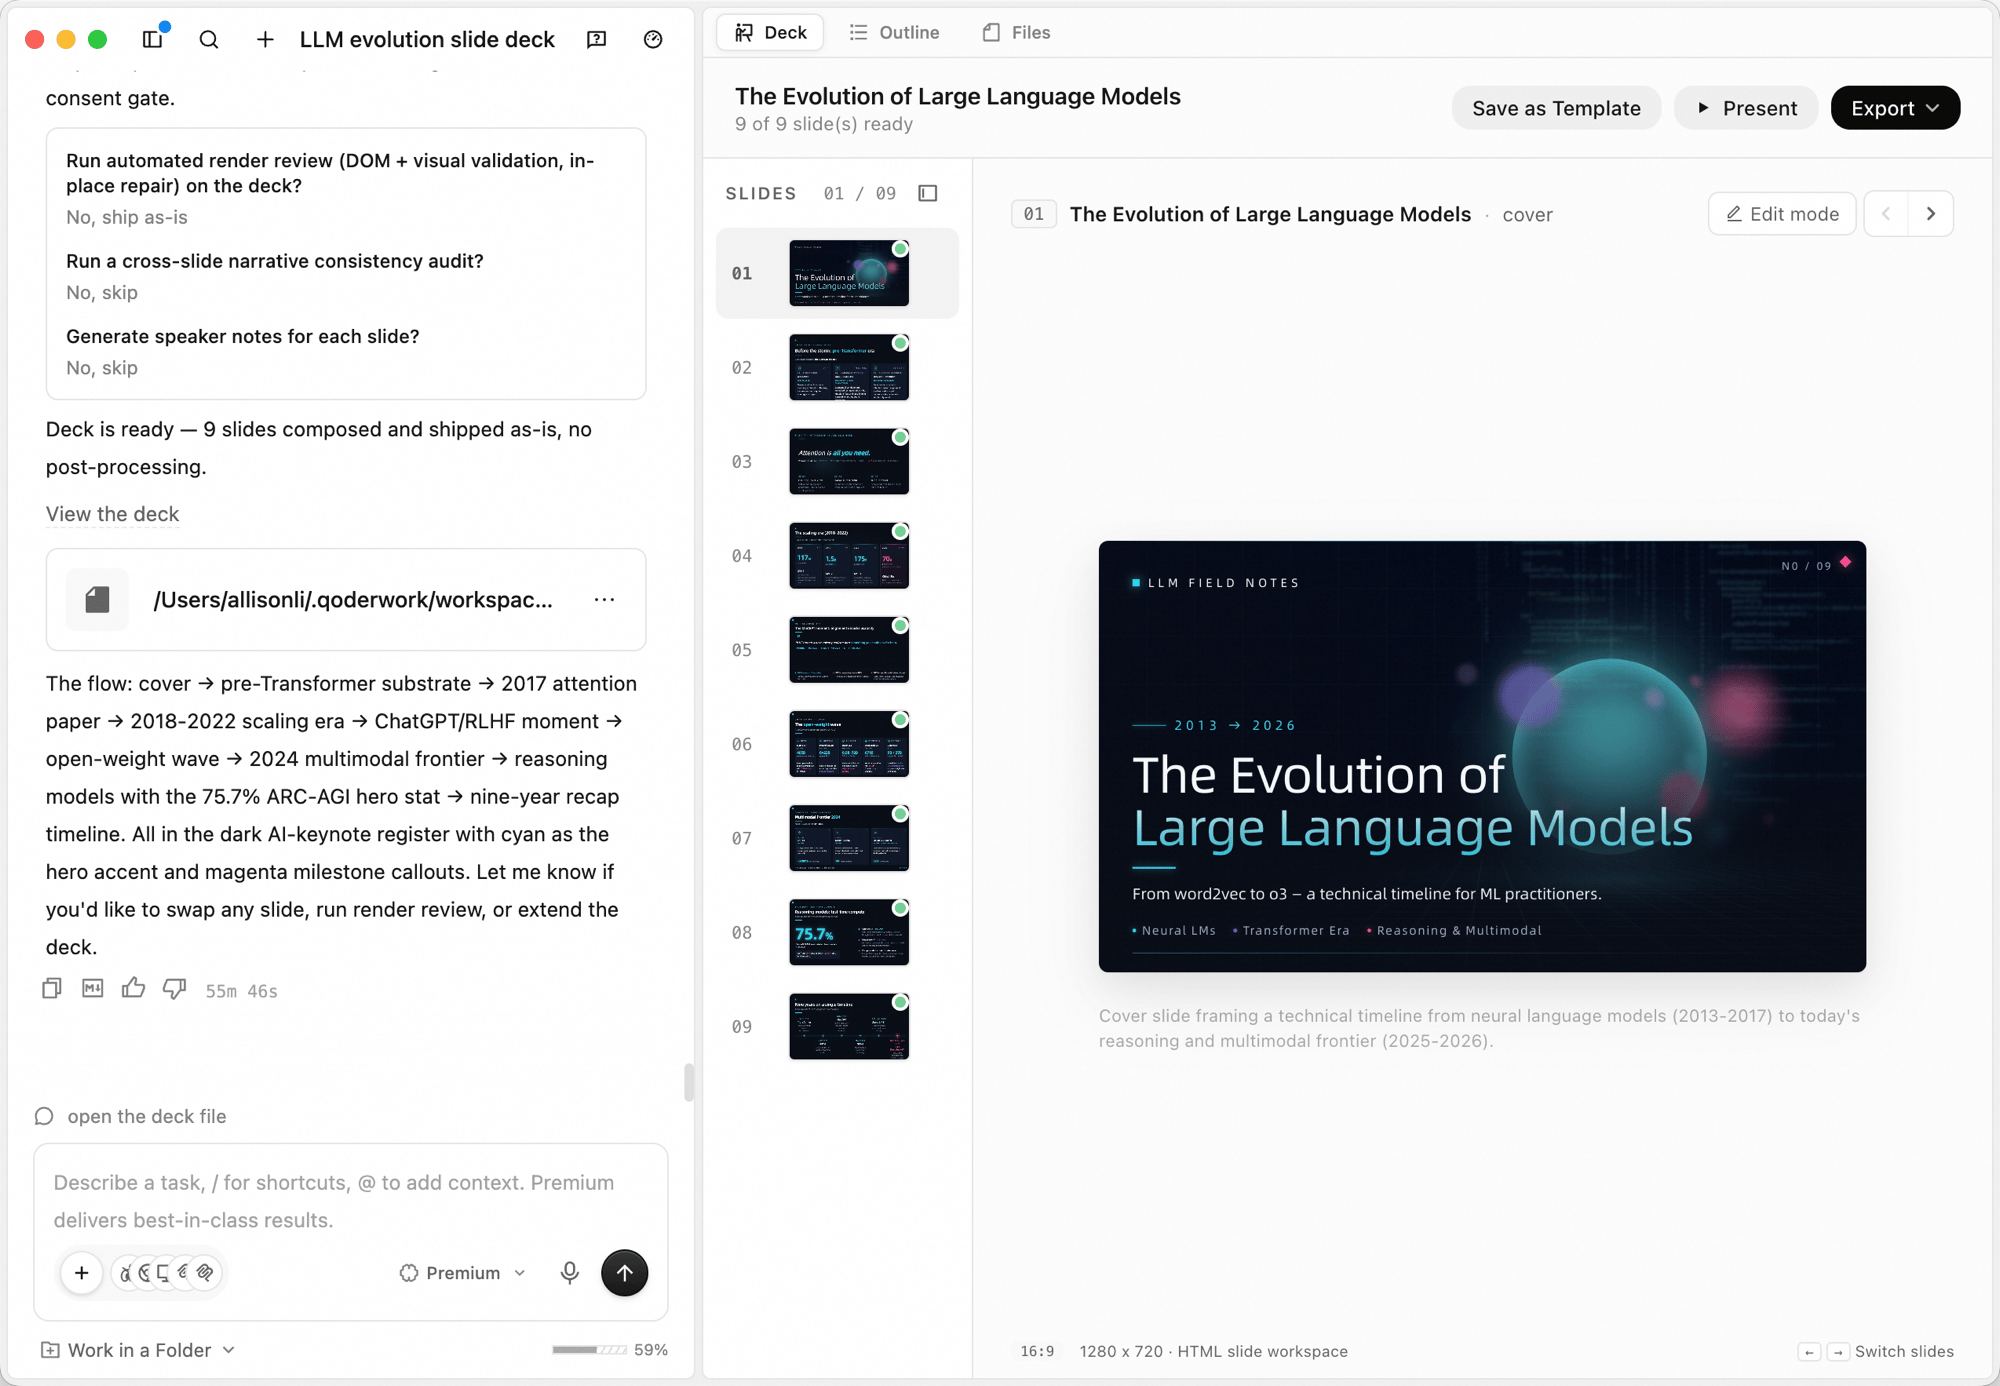
The canvas is a 16:9 HTML slide workspace (default 1280 × 720). Use the left/right arrows in the bottom-right corner — or your keyboard arrows — to switch between slides.
Creating a deck
1
Switch to Slides
In the input box, click the workspace switcher (defaults to General) and choose Slides.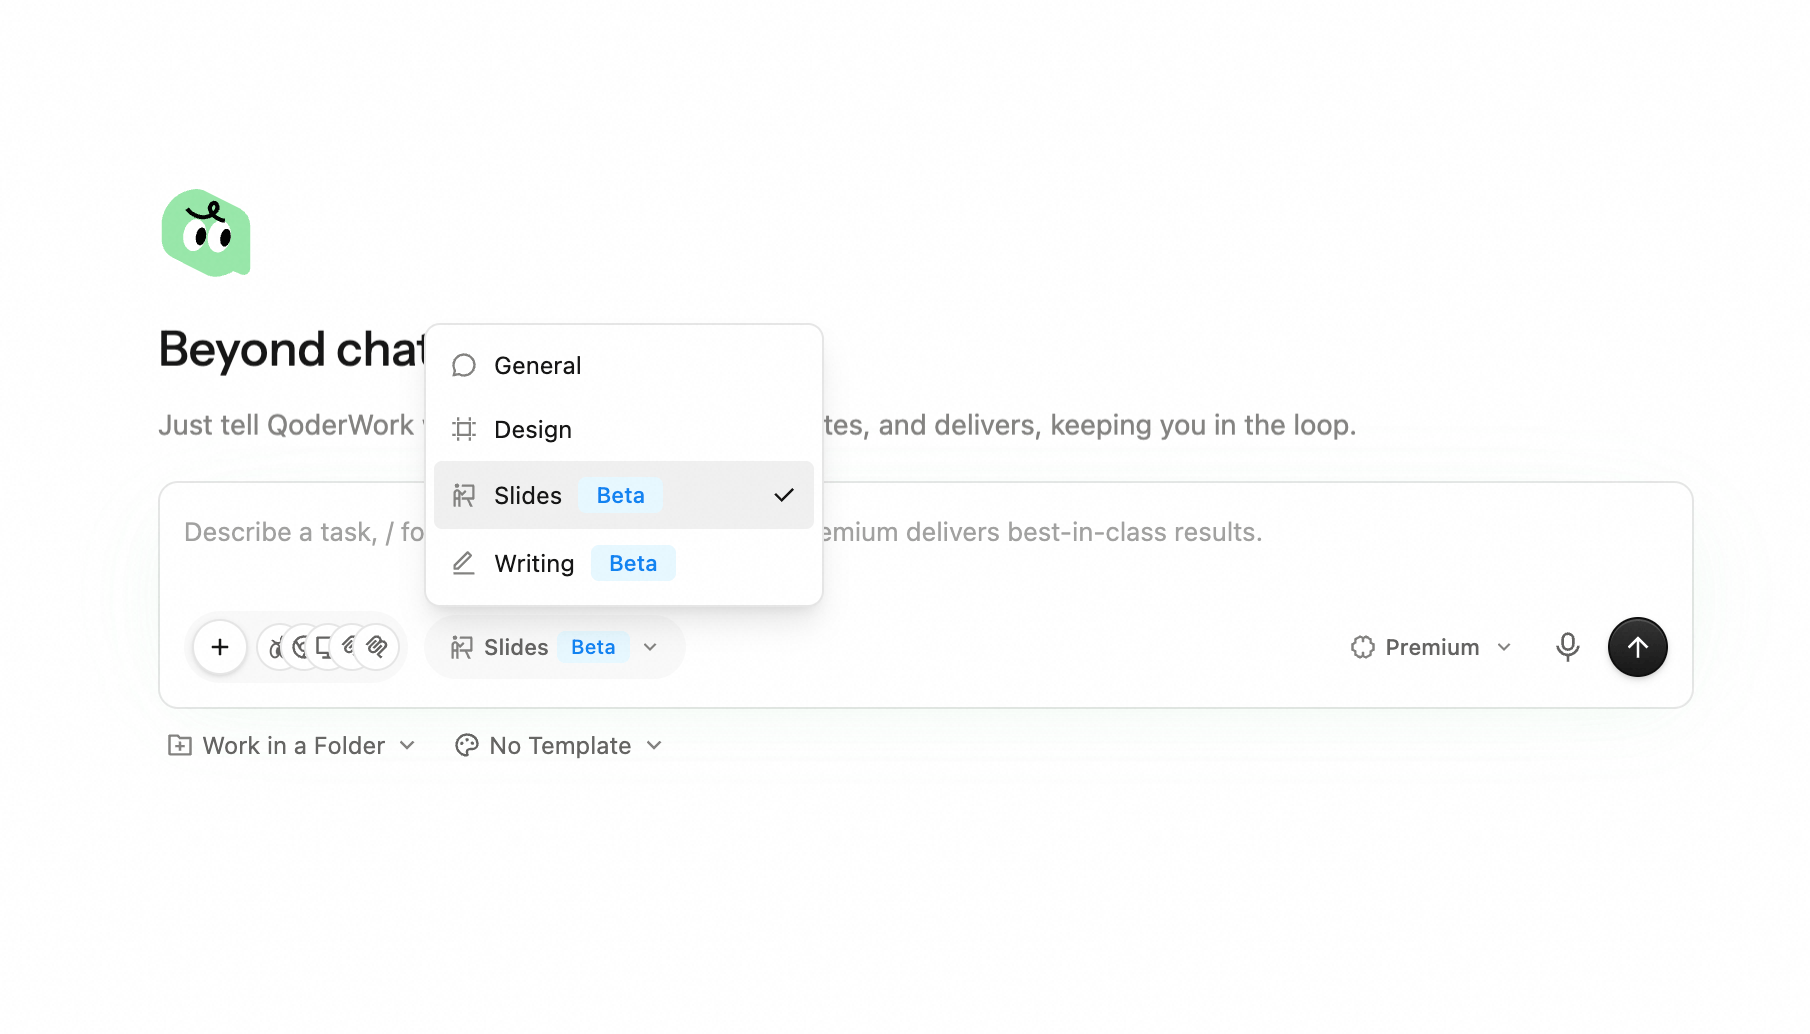
2
Tell the agent what you want
Describe the topic, audience, and the structure you have in mind. For example: “The Development Journey of Large Language Models – A Slide Presentation.”You can also dictate the brief with the microphone — see Voice Input.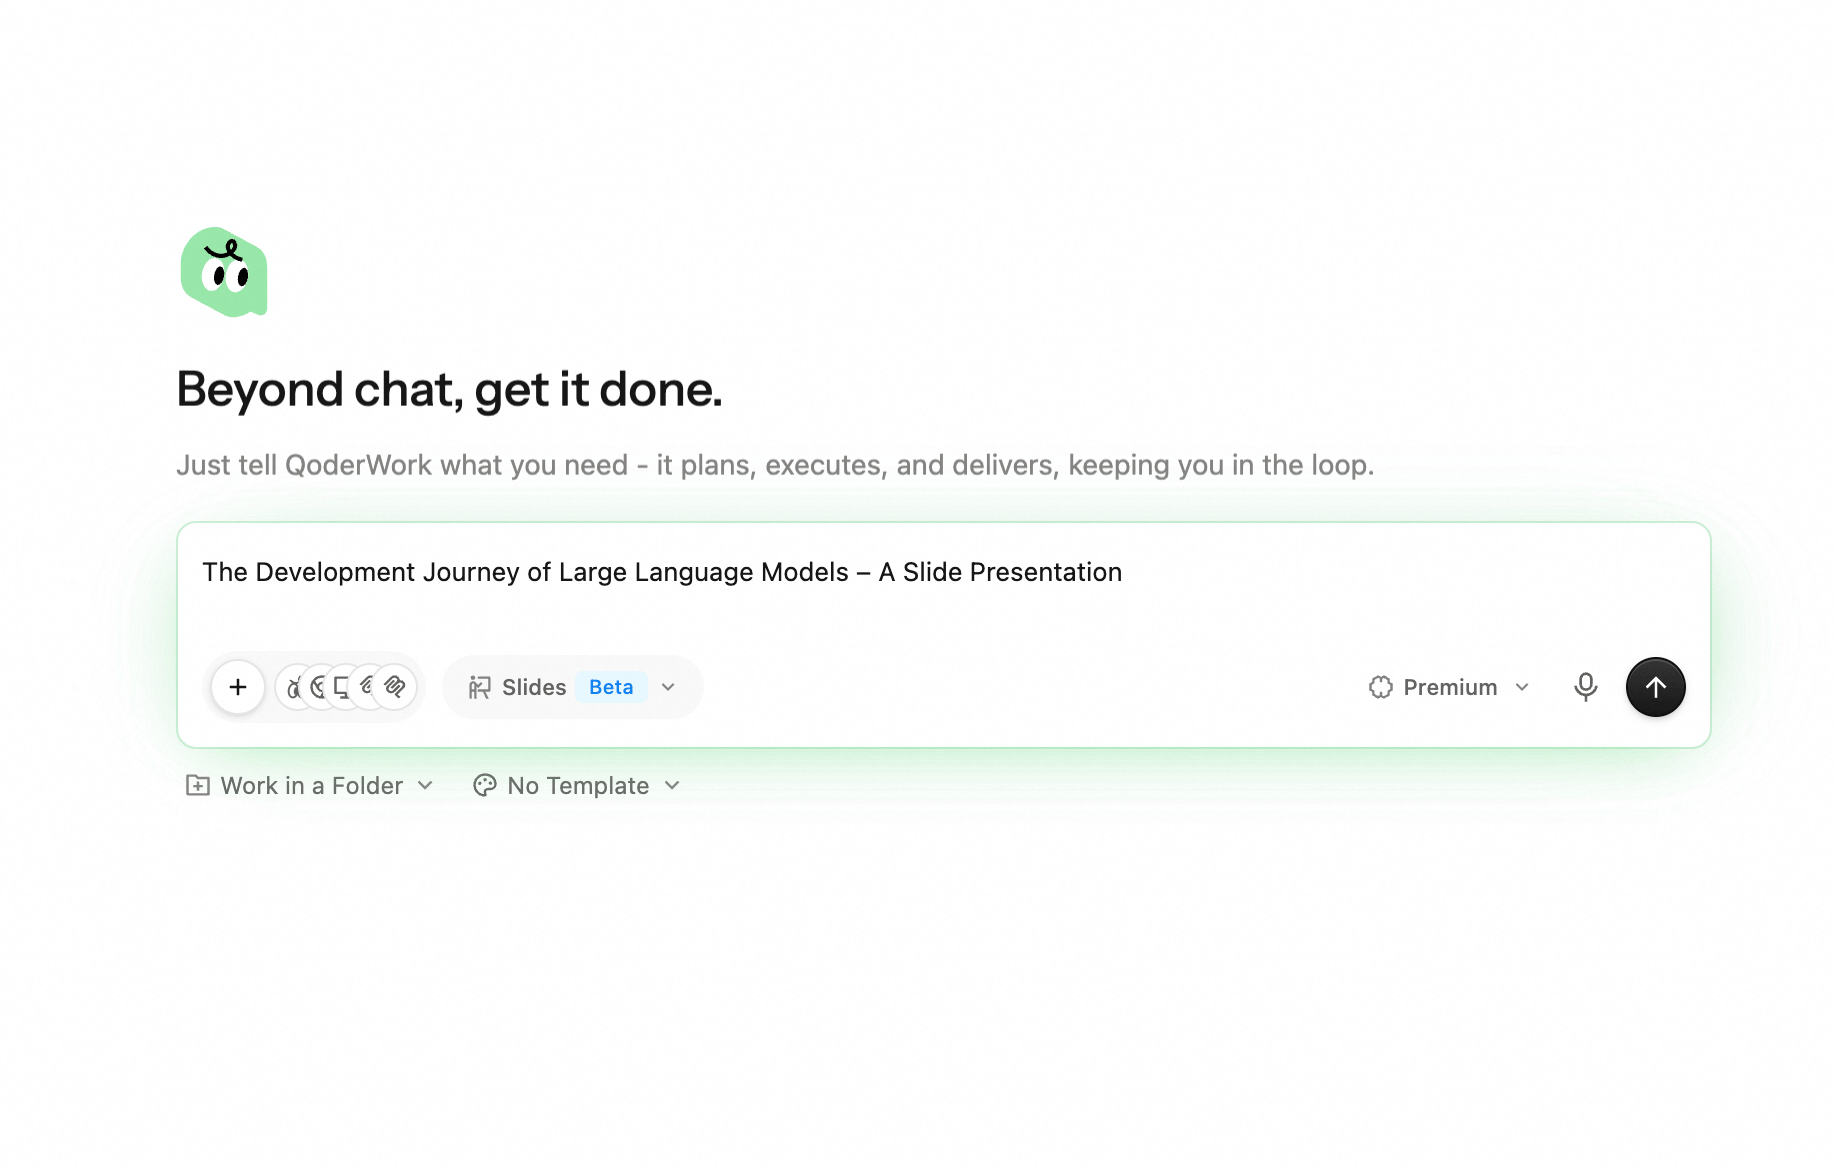
3
Pick a template and pin a folder (optional)
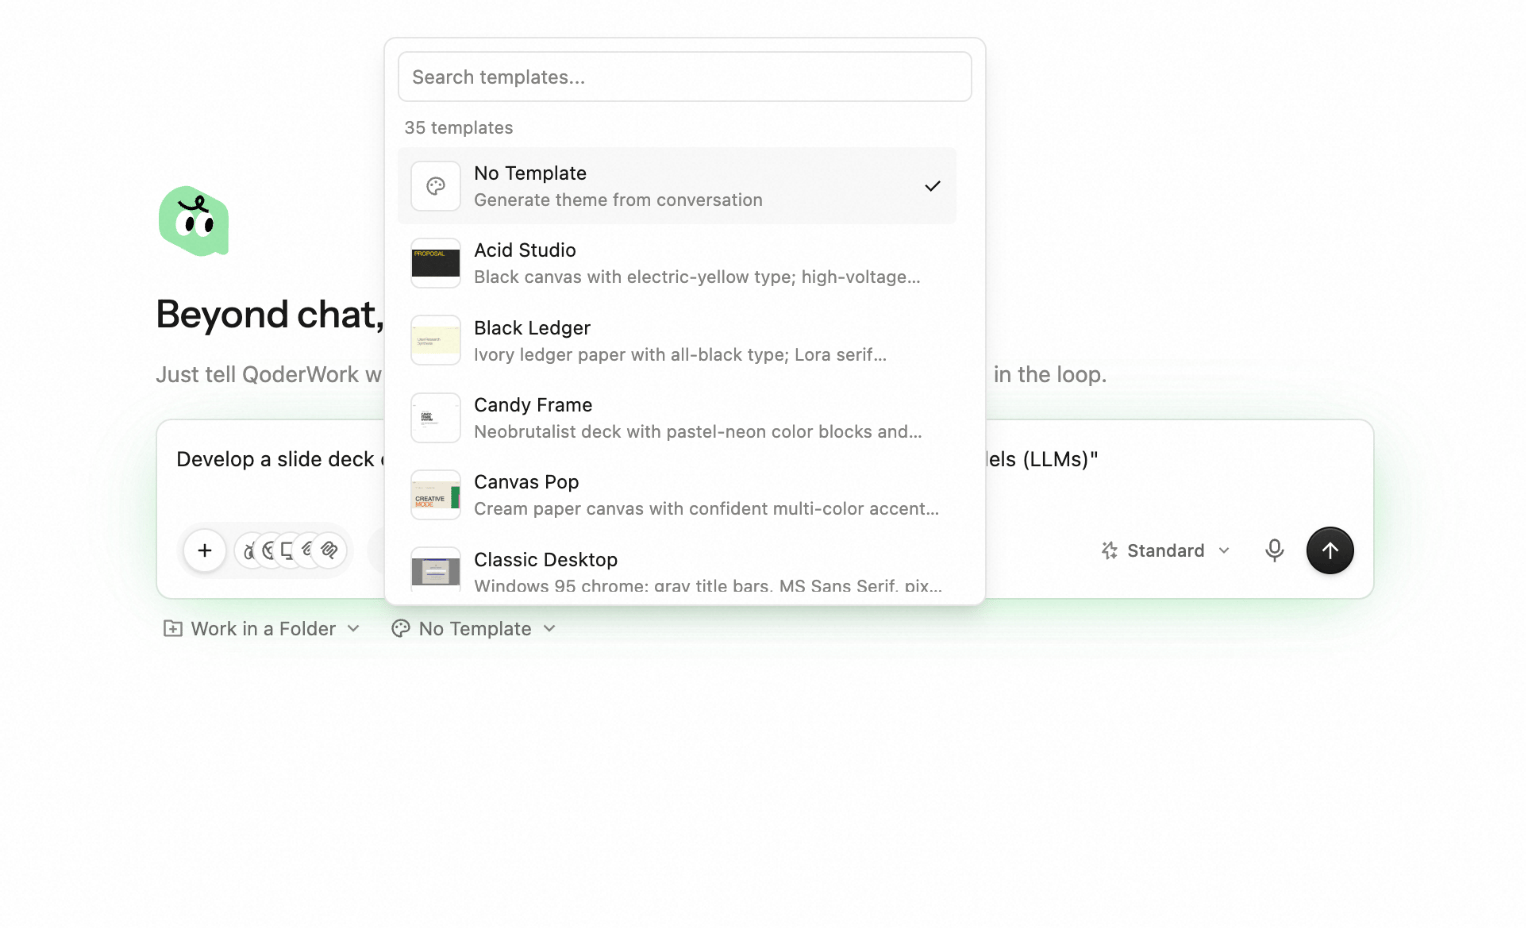
- Click the No Template button under the input box to pick from 35 built-in templates for the visual tone — or leave it as No Template to have the agent generate a theme from the conversation.
- Click Work in a Folder to pin the task to a local directory. The agent writes deck source files there, which makes long-term management and collaboration easier.
4
Answer the agent's clarifying questions
Before kicking off, the agent asks a few questions about audience, length, and language. Answering them grounds the deck in your actual context; if you’d rather skip the back-and-forth, hit Let AI decide at the bottom.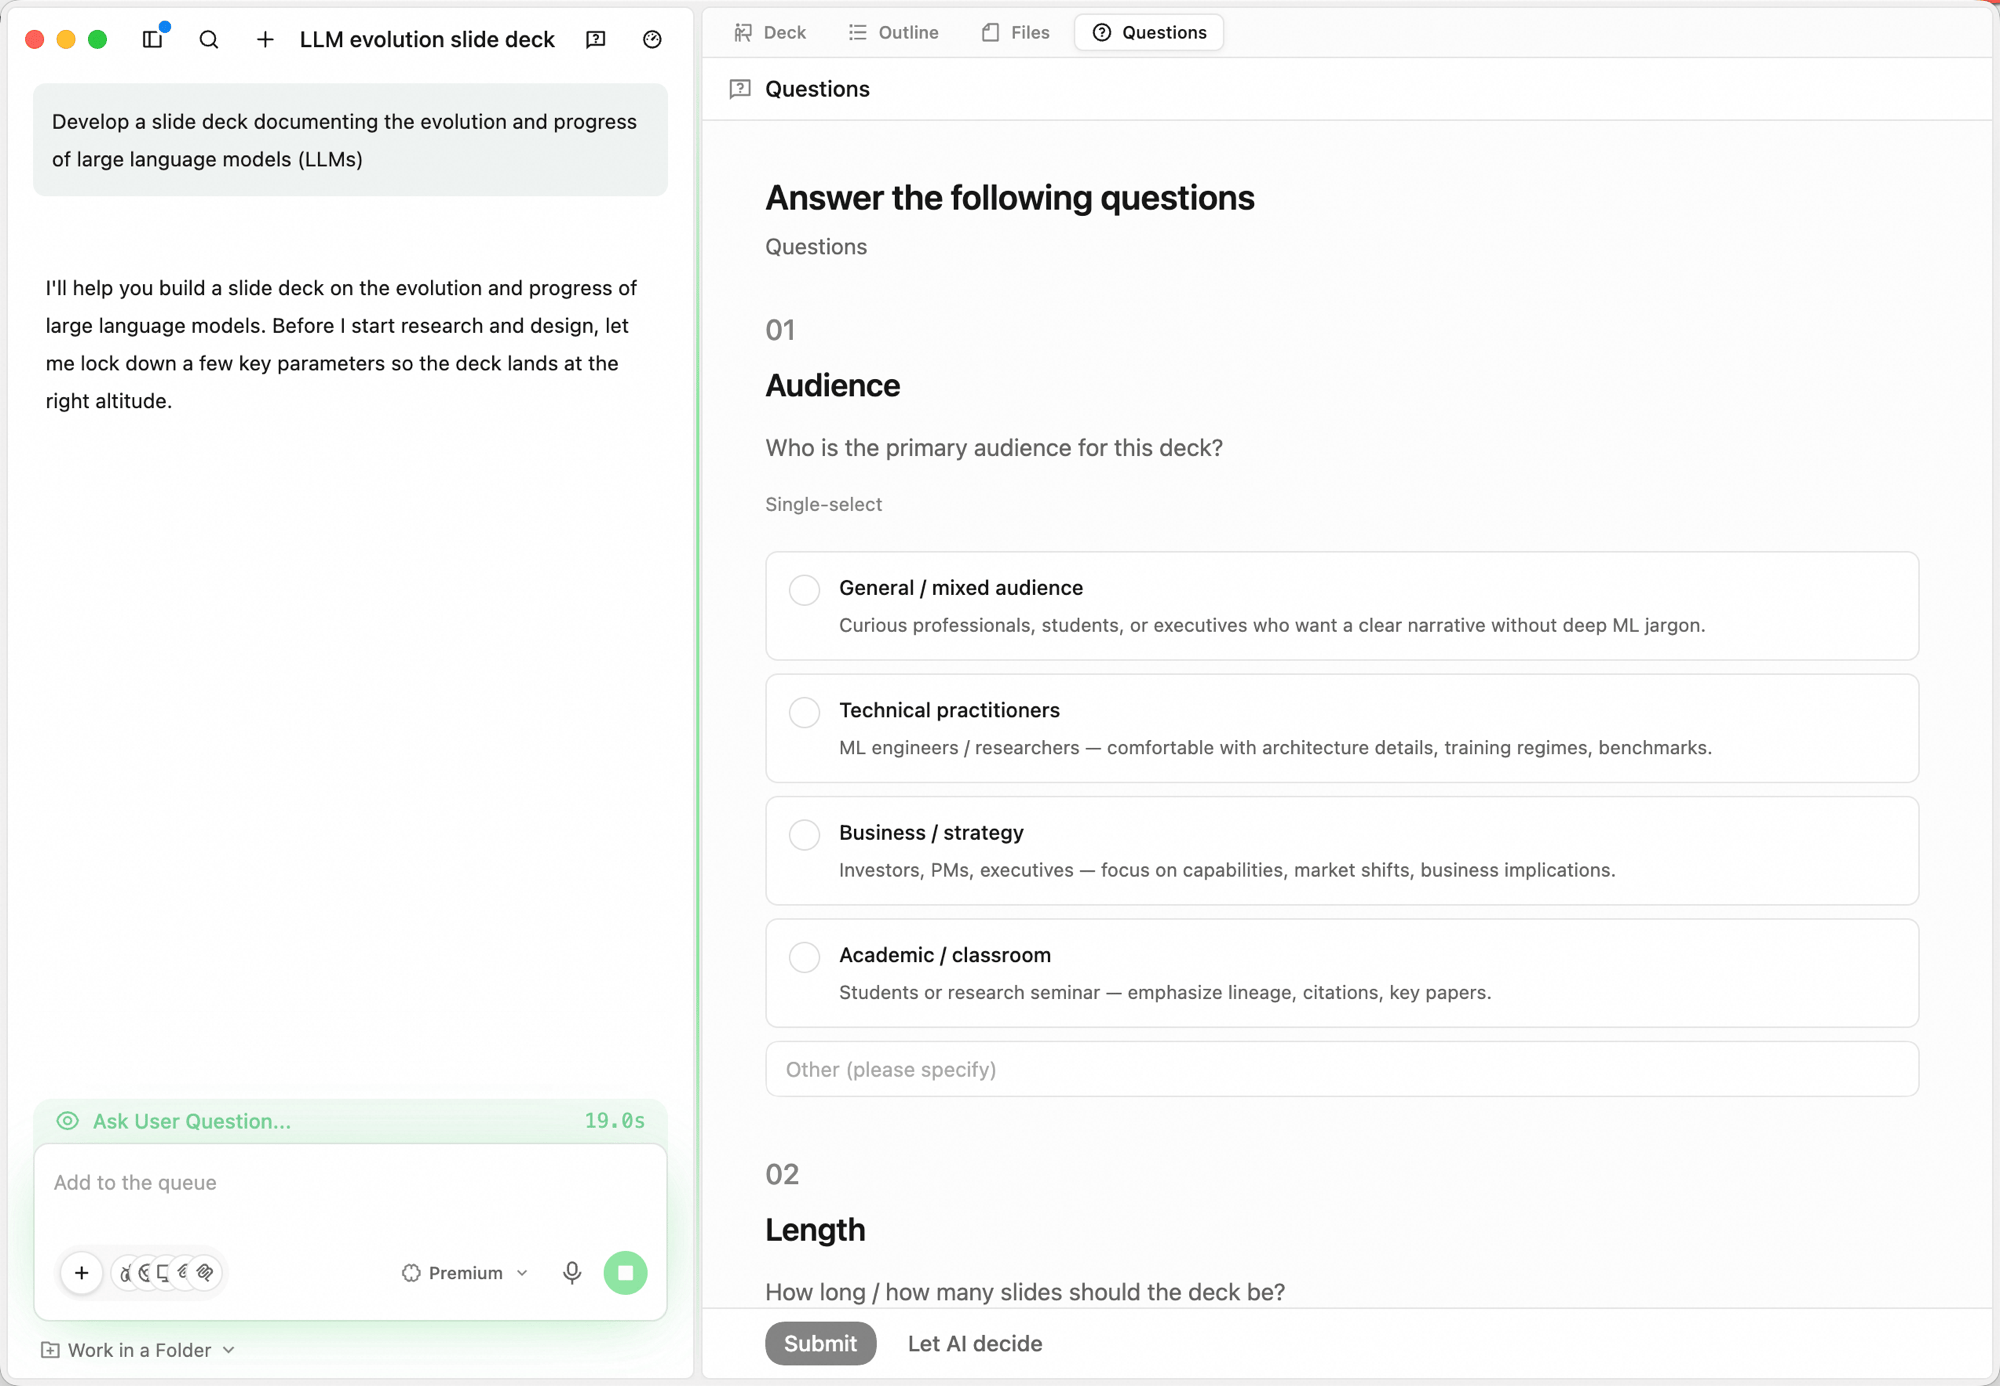
5
Confirm the outline
Once your answers are in, the agent proposes an outline under the Outline tab. Each section gets a one-line summary and a layout tag (cover slide, text outline, image-side, two-column, etc.). Click Accept outline to create the slide slots, or Reject with feedback to push back on structure or pacing before any slides are produced.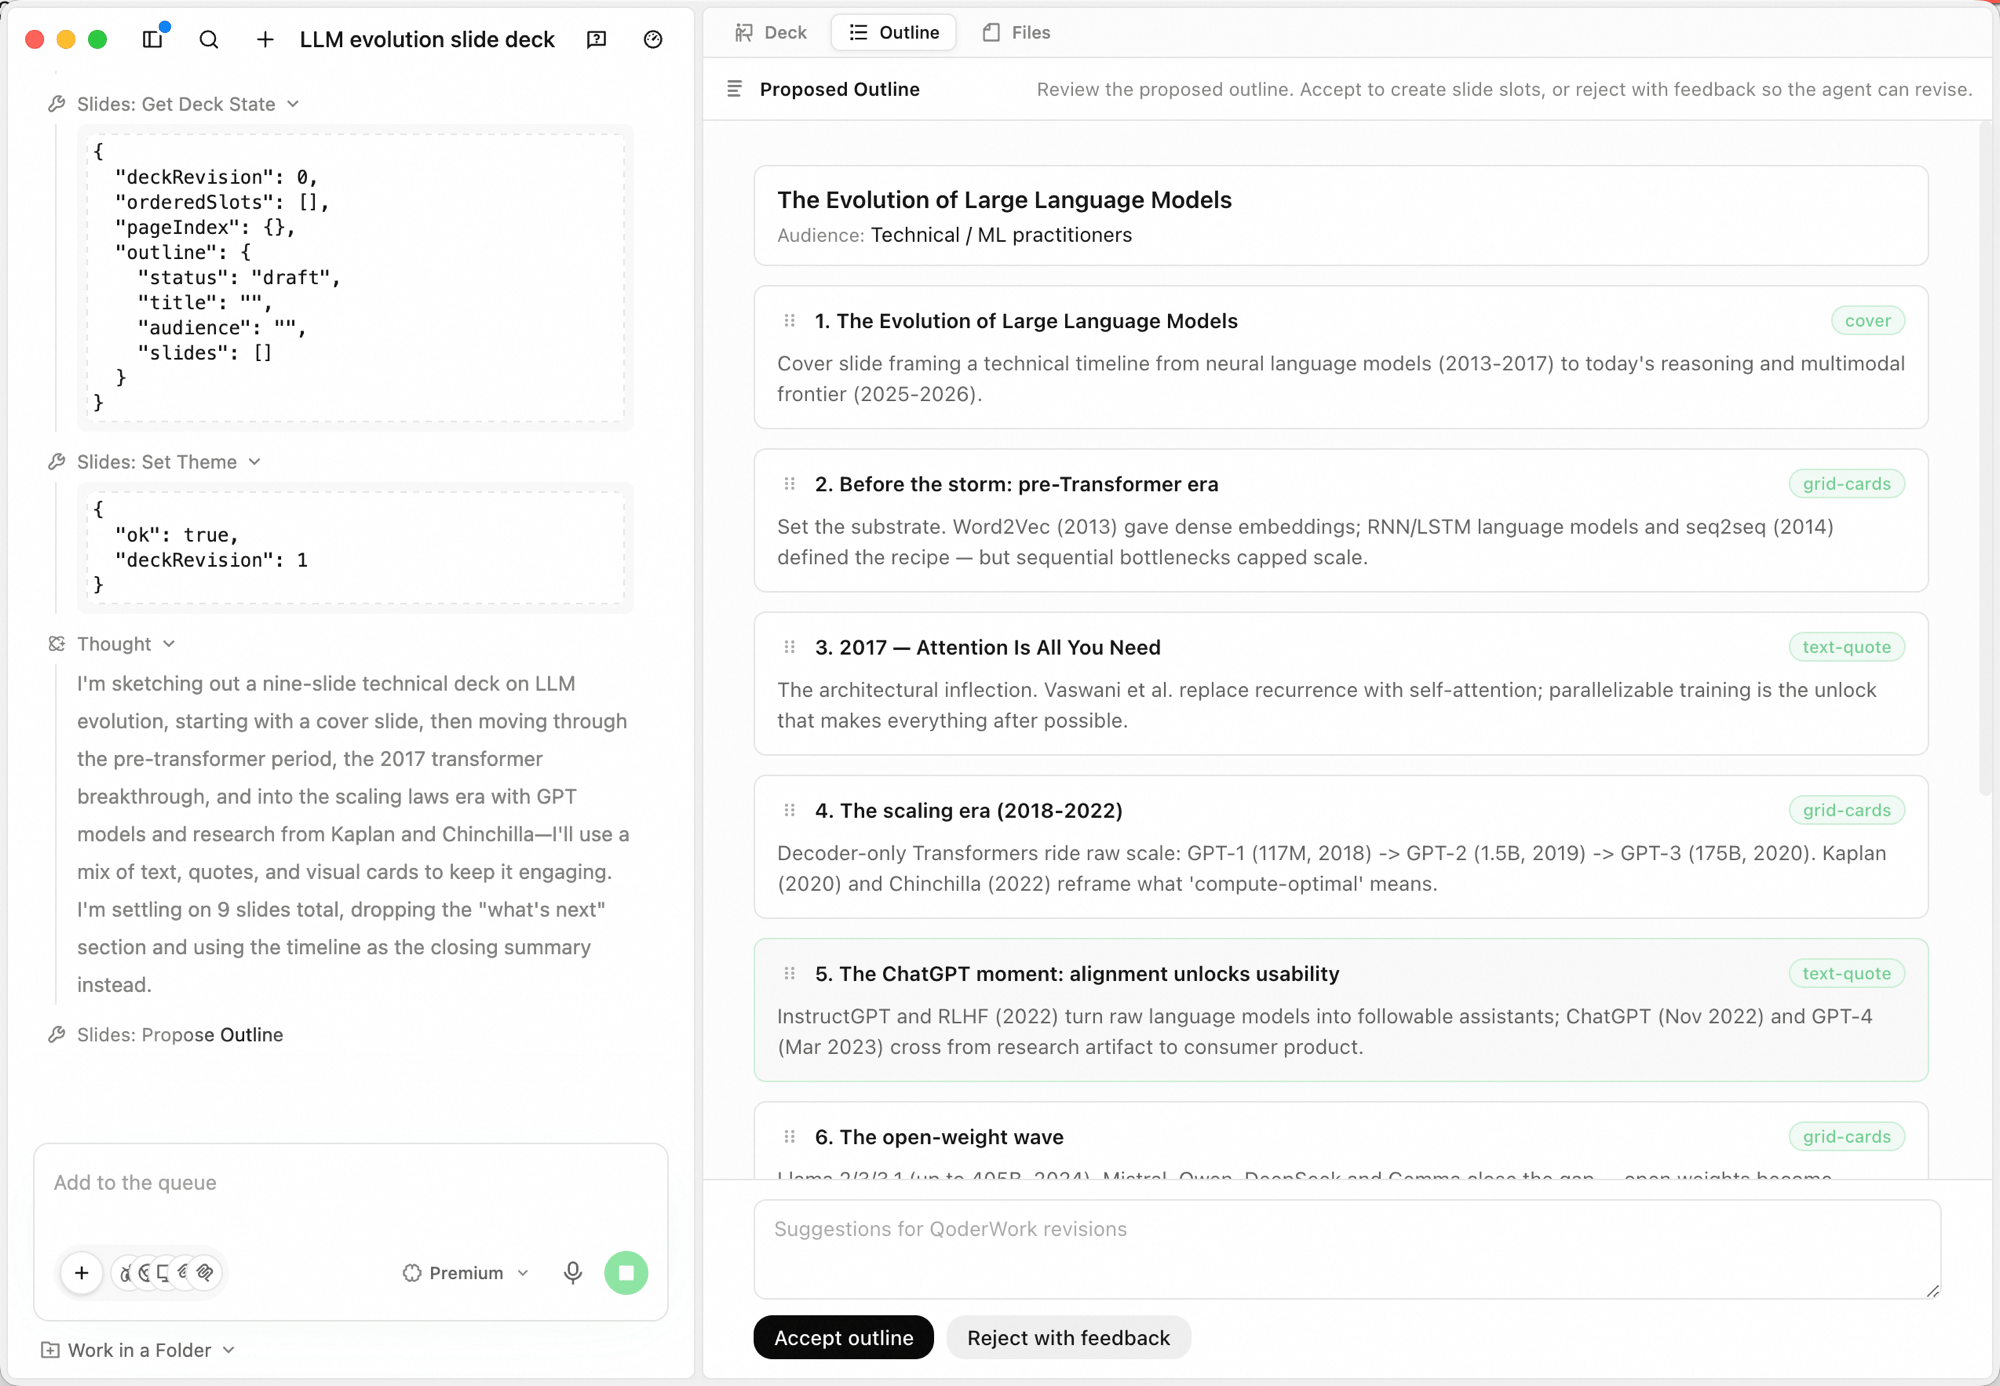
6
Watch slides fill in
Once the outline is confirmed, the agent creates slide slots and fills them in page by page. The center pane shows slide thumbnails (
SLIDES — N / N); the right pane renders the current slide. This phase is mostly hands-off — step away for a coffee — but if a page lands obviously off, drop a note in the bottom input box and the agent will adjust before moving on.7
Pick post-processing options (optional)
When every slide is composed, the agent asks whether to run any post-processing — multi-select, or skip them all to finish.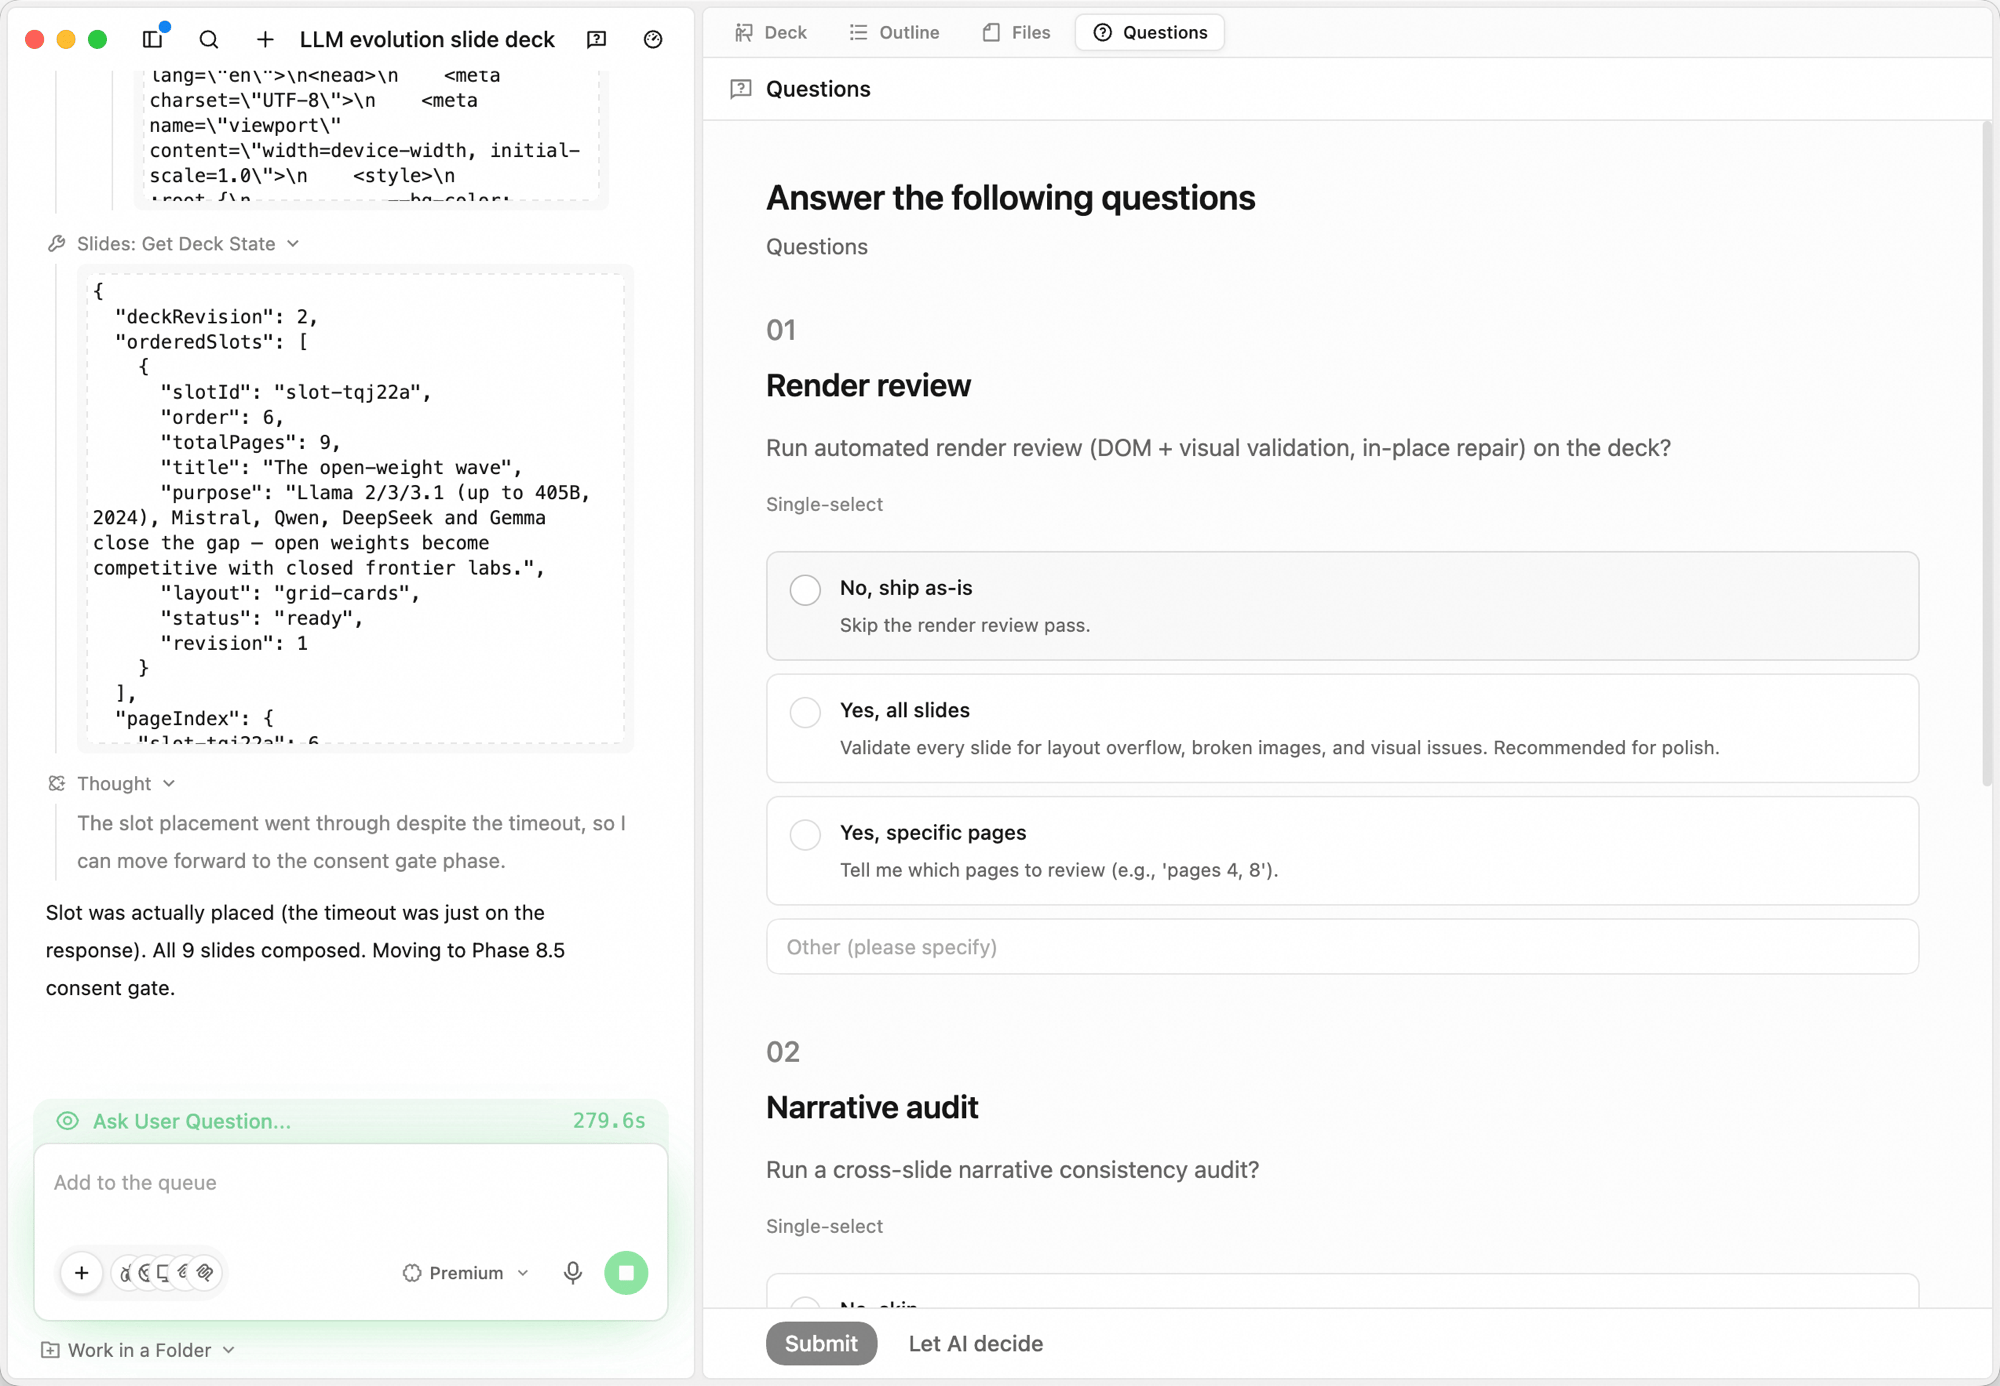
8
Review the finished deck
Once everything is ready, the canvas header switches to “N of N slide(s) ready” and the top-right exposes Save as Template / Present / Export. Click any thumbnail in the left list to jump; the right pane renders the current slide.
Iterating
- Add to the queue. Send follow-up instructions in the bottom input box — “swap to a comparison-table layout” — they’re applied after the current step.
- Stop a run. Click the stop button next to the input to halt generation mid-flight.
- Switch tabs to inspect. Open Outline to re-read the structure, or Files to inspect the source files behind the deck.
- Switch models. Use the model dropdown (e.g. Standard) to change models for the next step.
Present, export, save as template
The top-right corner has three actions:- Present — switch to a fullscreen presentation view for live demos and reviews.
- Export — download the deck as PPTX, PDF, or HTML.
- Save as Template — save the current deck as a reusable template for future runs.
Use cases
Internal review deck
Conference talk from a doc
Quick proposal deck
Training course slides
Product demo deck
Next Steps
Design
Generate designs as code on a canvas
Writing
AI-assisted writing and polishing